Homemade Creme Brulee: Best Easy Recipe (4 Ingredients)
If there is one dessert that perfectly bridges the gap between high-end restaurant elegance and simple home baking, it is this one. Creating a flawless homemade creme brulee might look intimidating when you see a pastry chef wielding a blowtorch, but the truth is, this impressive dessert only requires four basic ingredients and a tiny bit of food science knowledge.
You do not need a culinary degree to pull this off. By understanding exactly how heat interacts with egg yolks and sugar, you can master the ultimate homemade creme brulee on your very first try. Let’s break down the chemistry behind that unbelievably creamy custard and the iconic glass-like sugar shell so you can recreate restaurant-quality magic right in your own kitchen.
What Makes a Perfect Homemade Creme Brulee?
At its core, a perfect homemade creme brulee is simply a baked custard. However, unlike standard puddings that are thickened with cornstarch or flour, a true traditional custard relies entirely on the coagulation of egg proteins to create its structure. The contrast between the freezing cold, ultra-rich vanilla custard and the piping hot, shattered sugar crust is what makes this dessert universally loved.
If you recently made my Best Silky Homemade Flan recipe, you are already halfway to mastering this!
The Food Science of Creme Brulee
To get that incredibly luxurious texture (without accidentally making sweet scrambled eggs), we need to look at the exact chemistry happening inside your mixing bowl and your oven.
The Science of Tempering Egg Yolks When we combine egg yolks and sugar, we are preparing a base that is highly sensitive to heat. Egg yolk proteins begin to denature and tightly coagulate (scramble) at around 150°F (65°C). If you pour simmering heavy cream directly into your bowl of yolks, the sudden spike in thermal energy will instantly cook the eggs, leaving you with a lumpy disaster.
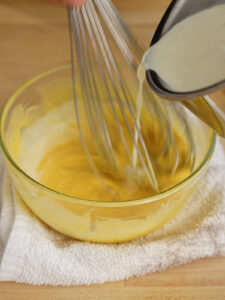
To prevent this, we use a culinary technique called tempering. By very slowly streaming the hot cream into the egg and sugar mixture while whisking aggressively, we gradually and evenly raise the temperature of the yolks. This disperses the proteins safely, allowing them to thicken the homemade creme brulee into a smooth, stable emulsion rather than clumping together.
While pure egg yolks scramble at 150°F, diluting them with the sugar and high-fat heavy cream physically gets in the way of the proteins, raising their coagulation point to around 170°F. Tempering gets them safely up to temperature so they can form a smooth, thickened web instead of tight, rubbery clumps.

The Science of Flavor Extraction (Vanilla Bean Paste) Why mix the vanilla bean paste into the egg yolks instead of heating it with the cream? Vanilla bean paste contains highly volatile aromatic compounds. By whisking it directly into the cold egg yolk and sugar mixture, we protect those delicate floral notes from flashing off or evaporating during the simmering process. The granulated sugar also acts as a physical abrasive, helping to break up and evenly disperse the sticky vanilla bean “caviar” throughout the base so every single bite is packed with flavor.
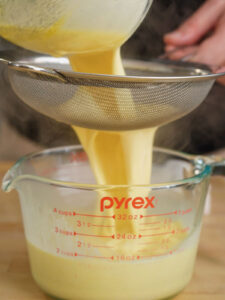
Why Straining the Custard is Mandatory Eggs contain a structure called the chalaza—the stringy, white anchor attached to the yolk. Furthermore, even with perfect tempering, a few microscopic egg proteins might accidentally coagulate. Running your liquid custard base through a fine-mesh strainer catches the chalaza, any cooked egg bits, and un-popped air bubbles. This single step is the ultimate cheat code for a flawless, silky homemade creme brulee texture.

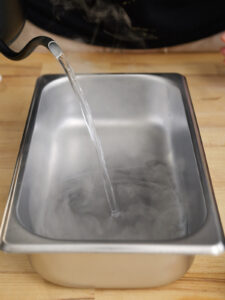
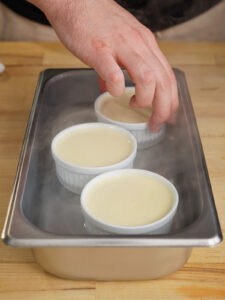
The Thermodynamics of the Water Bath (Bain-Marie) Baking a custard requires gentle, insulated heat. If you place a ramekin of custard directly into a 325°F oven, the dry heat will rapidly overcook the outer edges before the center has time to set.
By utilizing a water bath, we lock the maximum exterior temperature of the ramekin at exactly 212°F (100°C), because water cannot exceed this temperature without turning into steam. The water’s high heat capacity absorbs the harsh oven heat and transfers it gently to the homemade creme brulee, ensuring edge-to-edge perfection without rubbery edges.

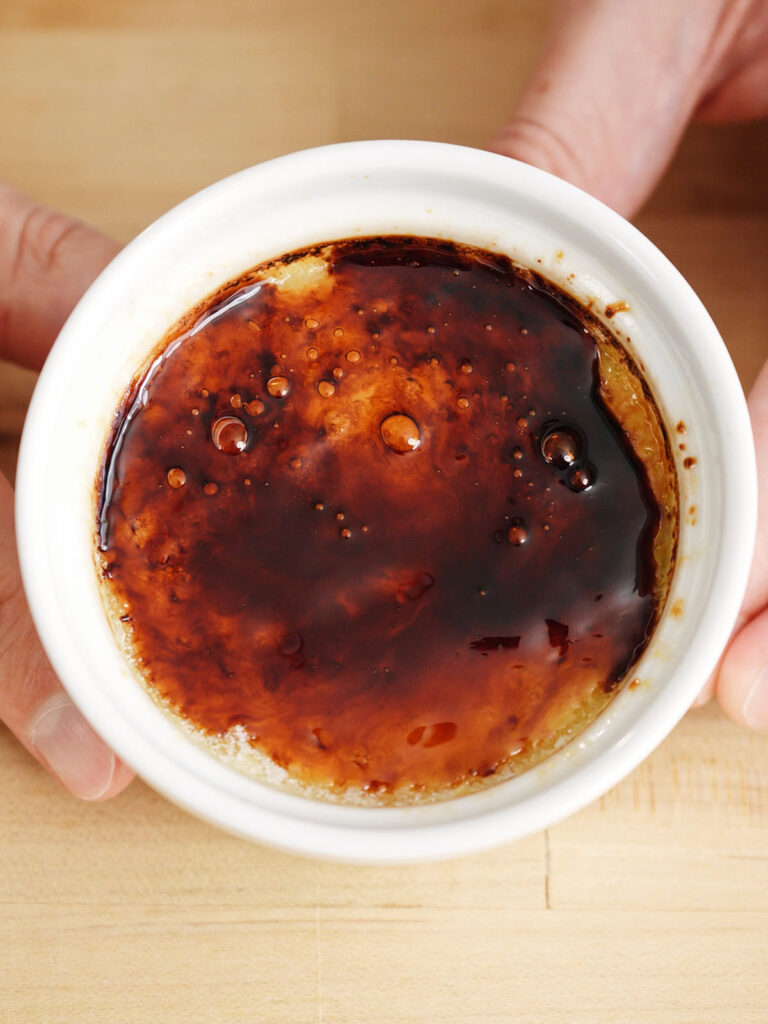
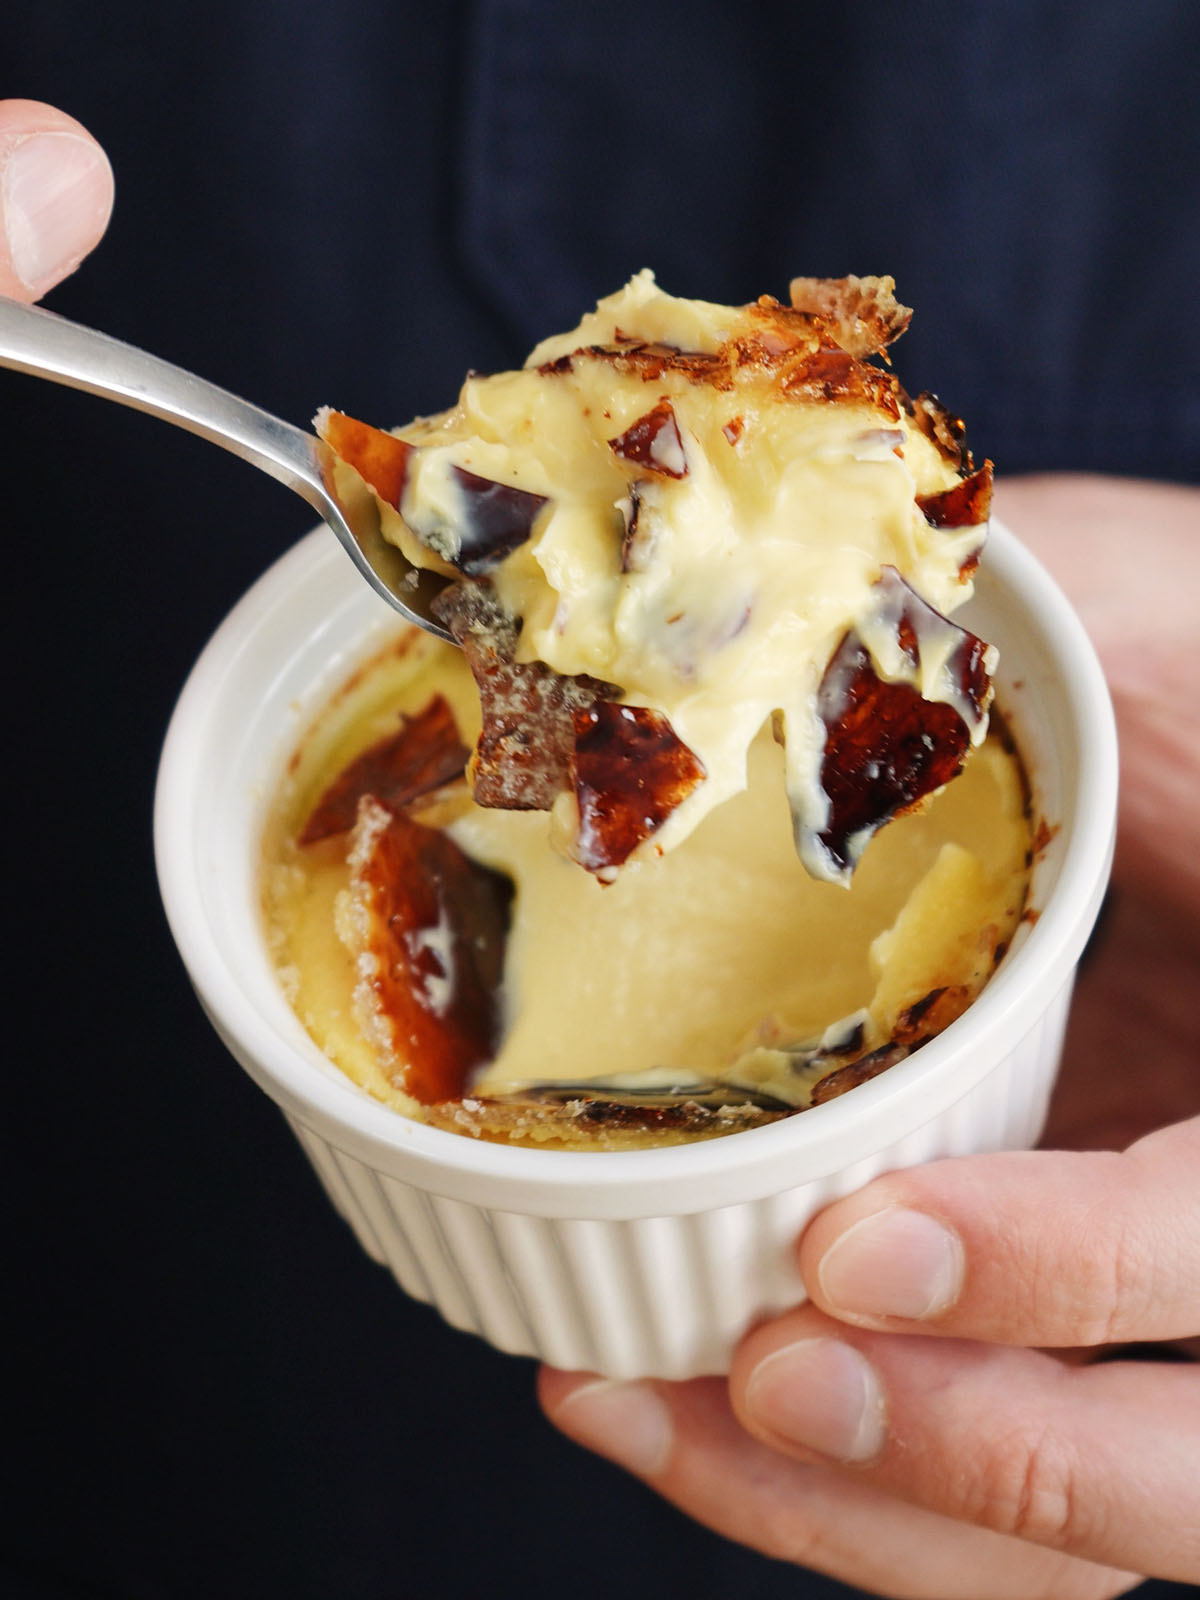
Caramelization: The Brulee Crust The literal translation of crème brûlée is “burnt cream.” When you take a blowtorch to the layer of granulated sugar on top of the chilled custard, you are triggering thermal decomposition. Around 320°F (160°C), the sucrose molecules undergo caramelization, breaking apart and reforming into complex, nutty, slightly bitter flavor compounds that perfectly balance the rich, sweet cream below it.

Troubleshooting Your Homemade Creme Brulee
Even the easiest recipes can run into snags. Here are a few common issues and exactly how to prevent them:
- Why is my homemade creme brulee runny in the middle? Custards need to hit an internal temperature of about 170°F to properly set. If your water bath was too cold when it went into the oven, or if you didn’t bake them long enough, the proteins won’t fully coagulate. Look for a uniform jiggle before pulling them out.
- Why is my sugar crust soft instead of crunchy? Two reasons! First, moisture is the absolute enemy of caramelized sugar. If condensation formed on your custard in the fridge, dab it gently with a paper towel before adding sugar. Second, the crust will melt if left in the fridge after torching. Always torch your homemade creme brulee immediately before serving!
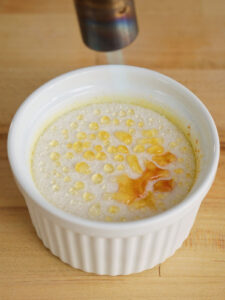
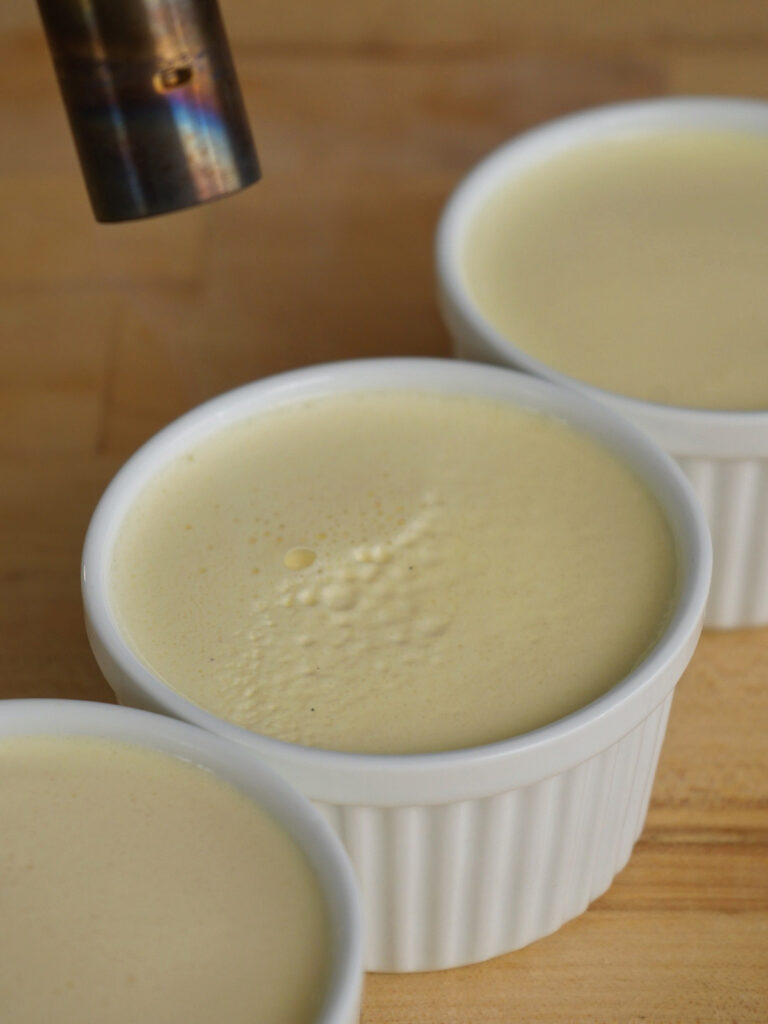
- Why does my custard have bubbles on top? Whisking naturally incorporates air. If you see foam on top of your ramekins right before baking, quickly run your blowtorch over the surface to instantly pop the bubbles for a perfectly smooth top.
🛒 Shop the Recipe
Having the right tools completely removes the stress from this process. Here are the exact items I use to make this homemade creme brulee:
- Nielsen-Massey Vanilla Bean Paste (Essential for authentic flavor and those beautiful black specks!)
- 6oz Ceramic Ramekins (The ideal size for individual portions)
- Fine Mesh Strainer (Crucial for catching egg proteins)
- Culinary Blowtorch (This is the easiest way to get that classic “brûlée” on top)
As an Amazon Associate, I earn from qualifying purchases at no extra cost to you!
How to Make This Homemade Creme Brulee
1. Heat the Cream In a medium saucepan, gently heat the heavy cream by itself over medium-low heat until it reaches a gentle simmer. Do not let it come to a rolling boil. Remove from heat.
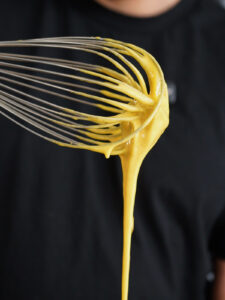
2. Whisk the Yolks In a separate large glass mixing bowl, combine the 4 egg yolks, 1/4 cup of granulated sugar, and 1 teaspoon of vanilla bean paste. Whisk thoroughly until the mixture becomes pale yellow and remarkably creamy.

3. Temper the Mixture Very slowly pour the hot cream into the egg yolk mixture, whisking constantly and vigorously. Take your time here so you do not accidentally scramble the eggs!
4. Strain and Fill Pour the liquid custard through a fine-mesh strainer into a large measuring cup with a spout, discarding any solids left behind. Place your ramekins into a deep baking pan and evenly distribute the custard into the ramekins. If you see surface bubbles, quickly pop them with your torch.
5. The Water Bath Carefully pour boiling hot water into the baking pan until the water reaches about halfway up the sides of the ramekins.

6. Bake and Chill Carefully move the pan to a preheated 325°F oven and bake for roughly 30-35 minutes. Your homemade creme brulee is done when the edges are set but the centers jiggle like gelatin. Remove the ramekins from the water bath, let them cool to room temperature, and then chill in the refrigerator for at least 4 hours.
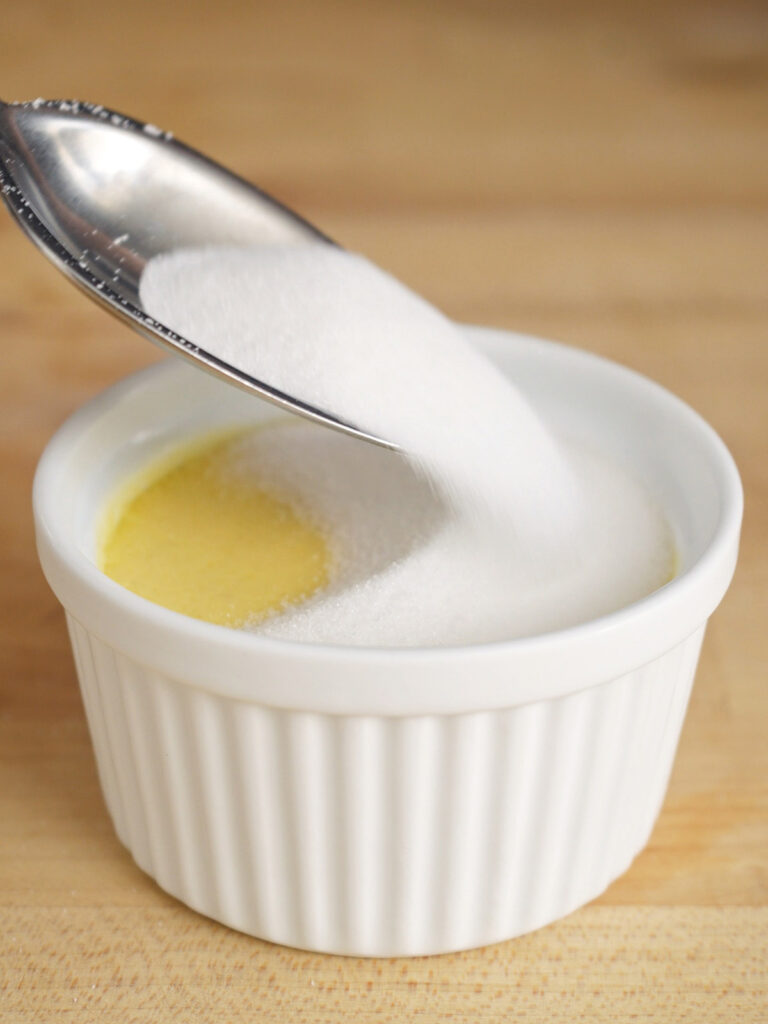
7. Torch and Serve Right before serving, sprinkle roughly 1 teaspoon of granulated sugar in a thin, even layer over the top of each chilled homemade creme brulee. Use a culinary torch to melt and caramelize the sugar until it forms a deep amber, glass-like crust.
Homemade Creme Brulee: Best Easy Recipe (4 Ingredients)
Ingredients
Method
- Preheat: Preheat your oven to 325°F (165°C) and bring a kettle of water to a boil for your water bath.
- Mix Yolks and Sugar: In a large mixing bowl, thoroughly whisk the 4 egg yolks, 1/4 cup of granulated sugar, and 1 teaspoon of vanilla bean paste together until the mixture turns a pale, creamy yellow.
- Simmer the Cream: In a saucepan, heat the heavy cream over medium-low heat until it just begins to simmer. Remove from heat.
- Temper: Continuously whisk the egg mixture while slowly streaming in the hot heavy cream to slowly raise the temperature of the eggs without scrambling them.
- Strain: Pour the combined liquid custard through a fine-mesh strainer into a pouring vessel to catch any coagulated egg proteins or chalazae.
- Prep Ramekins: Place four 6oz ramekins into a deep roasting pan. Pour the strained custard evenly into the ramekins. (Tip: Quickly torch the surface of the liquid to pop any air bubbles).

- Water Bath: Carefully pour the boiling water into the roasting pan until it reaches halfway up the exterior sides of the ramekins.
- Bake: Transfer to the oven and bake for 30-35 minutes until the outer edges are set, but the center still jiggles slightly when shaken.
- Chill: Remove the ramekins from the water bath, allow them to cool to room temperature, then refrigerate for at least 4 hours (or overnight) until fully chilled and firm.
- Brulee: Immediately before serving, Sprinkle roughly 1 teaspoon of granulated sugar in a thin, even layer over the top of each chilled custard. Use a culinary torch to melt the sugar until it turns a deep, golden amber. Let it sit for 60 seconds to harden into a glass shell, and enjoy your homemade creme brulee!